Okta
This guide will walk you through setting up an Okta directory integration. The Okta directory integration supports two main use cases:
- SCIM User Provisioning: This enables Okta users to be automatically synced over to Beyond Identity by means of SCIM.
- Registration Syncing: This feature facilitates a passwordless experience by enabling Okta to redirect users to Beyond Identity, bypassing the username/password input screen. However, if this redirect occurs before a Passkey is linked to the employee's device, authentication may fail. Registration Syncing allows Beyond Identity to inform Okta when it is appropriate to route users to Beyond Identity.
Legend
In the following sections, a color-coded indicator has been added to a heading to help identify whether the steps should be performed using Beyond Identity or a different application.
🔵 Beyond Identity: Actions to be performed in the Beyond Identity platform are highlighted in blue.
🟠 Okta: Actions to be performed in the Okta platform are highlighted in orange.
🟠 Create a Beyond Identity Group
To enable specific users to authenticate passwordlessly with Beyond Identity, you shold create a group and include those users in it.
🟠 Generate an API Token
In order for users to be appropriately routed to Beyond Identity from Okta, Beyond Identity must notify Okta when a user successfully binds a Passkey onto their device. This notification is facilitated through the byndidRegistered attribute, which you would have configured previously. It is necessary for Beyond Identity to possess an Okta API token in order to communicate the update to Okta.
🟠 Create a SCIM Application
🔵 Create a Directory Integration
In order to create an Okta Directory Integration, navigate to Directory > Directory Integrations > Add Directory Integration and click on Okta.
1. Generate Credentials
The Okta SCIM application you created will expect a bearer token. Select Bearer Token and click on Generate.
Keep the bearer token and SCIM URL in a safe place as you will need them to configure the Okta SCIM application you already created.
| Credentials Type | Description | What it Looks Like |
|---|---|---|
| Client Credentials | Upon selection, you will be provided with a client_id and client_secret. | 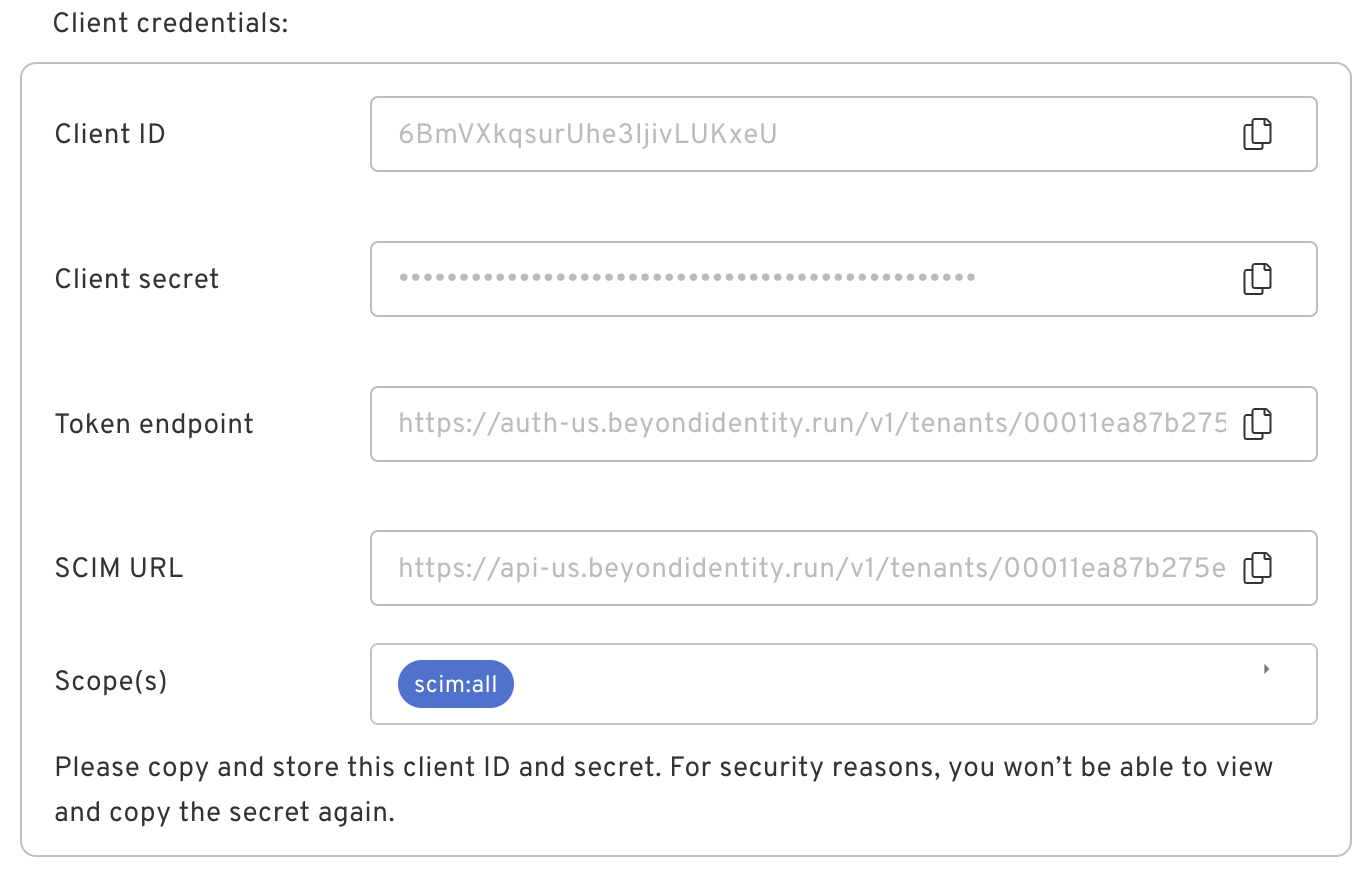 |
| Bearer Token | If you select bearer token, you will see a token displayed. | 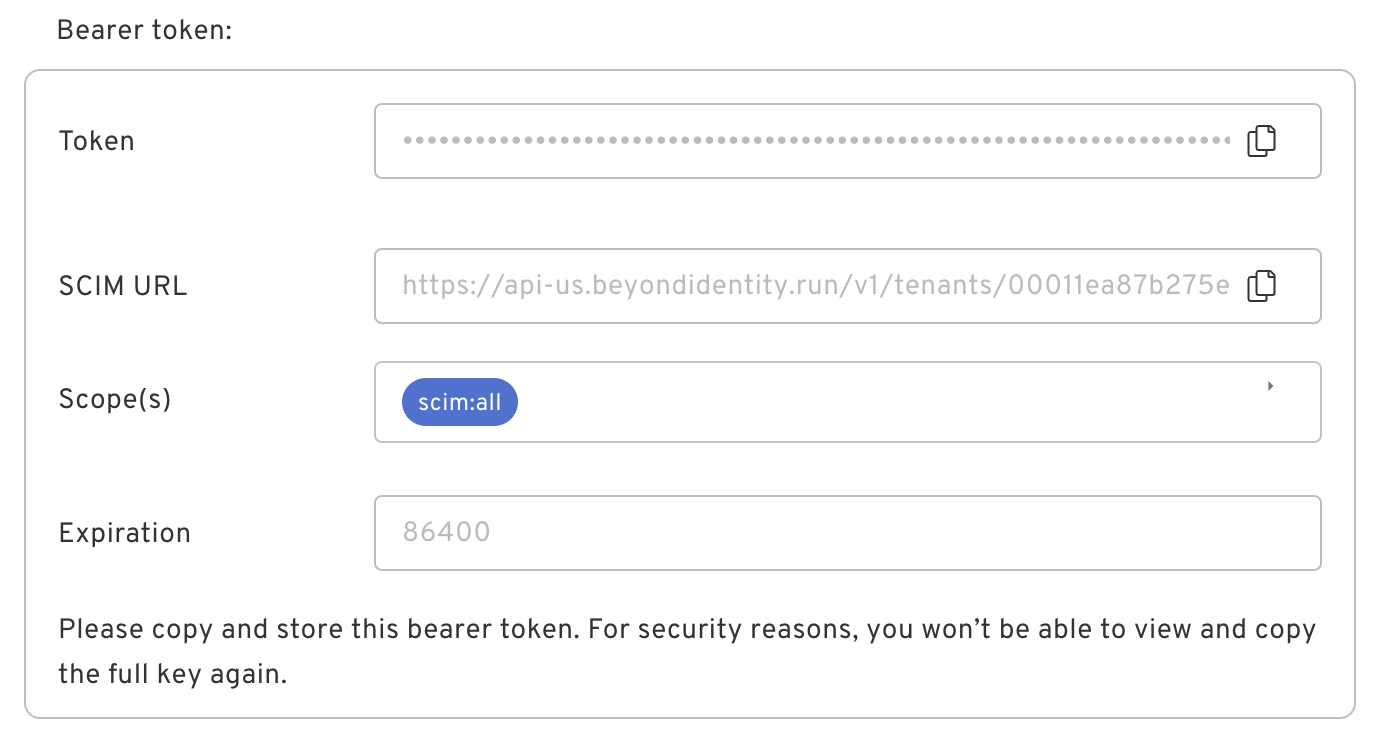 |
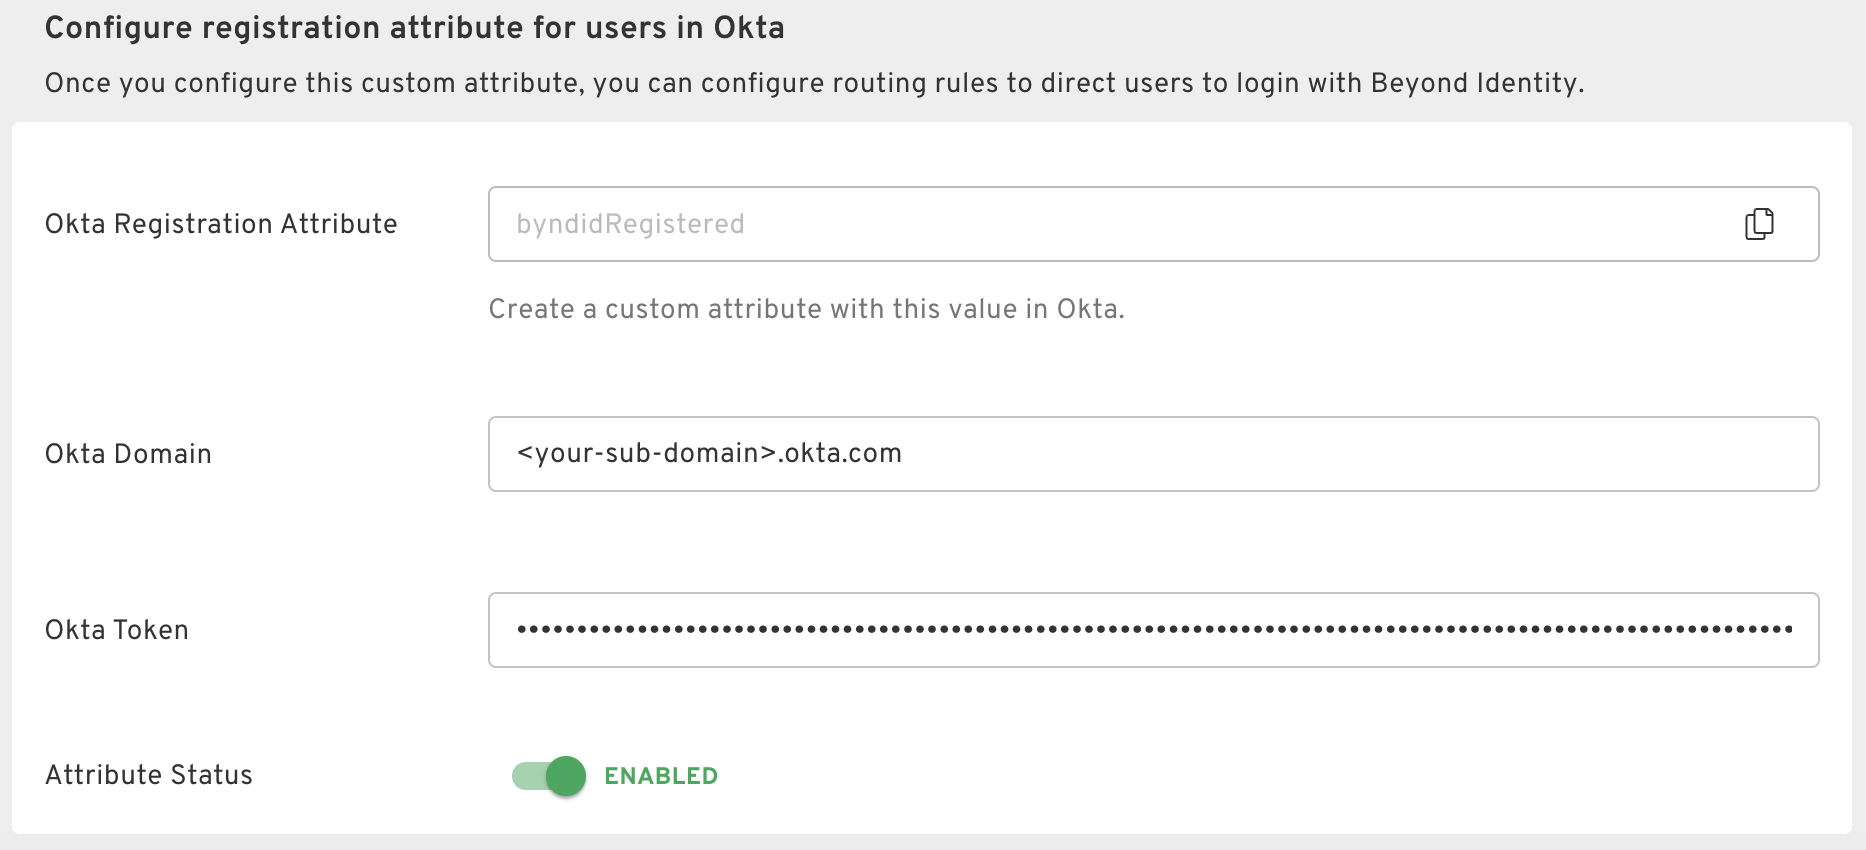
2. Configure the Registration Attribute
Finish configuring your Okta directory integration by entering your Okta domain as well as the API token you created in above.
🟠 Finish Configuring the Okta SCIM Application
Configure the SCIM application in Okta with the SCIM URL and bearer token you generated in the Beyond Identity directory integration. After you've configured provisioning, enable the following actions:
- Create Users
- Deactivate Users
🟠 Synchronize Users via SCIM
Push the group you created above to Beyond Identity. Once this is done, all users in the Beyond Identity group will show up in Beyond Identity under Directory > Identities.