Create Roles
Overview
Creating Roles allows administrators to restrict identity permissions for performing privileged actions in the Secure Access admin console. For example, administrators can create and define a role called "Help Desk Admins" with permissions to perform limited privileged actions, like sending enrollment emails but not deleting identities.
What You'll Learn
This article will guide you through the process of:
- Creating a new role and customizing its permissions
Legend: 🔒 = Sensitive scope (see Sensitive or Administrative Permissions)
How to Create a Role
Steps
-
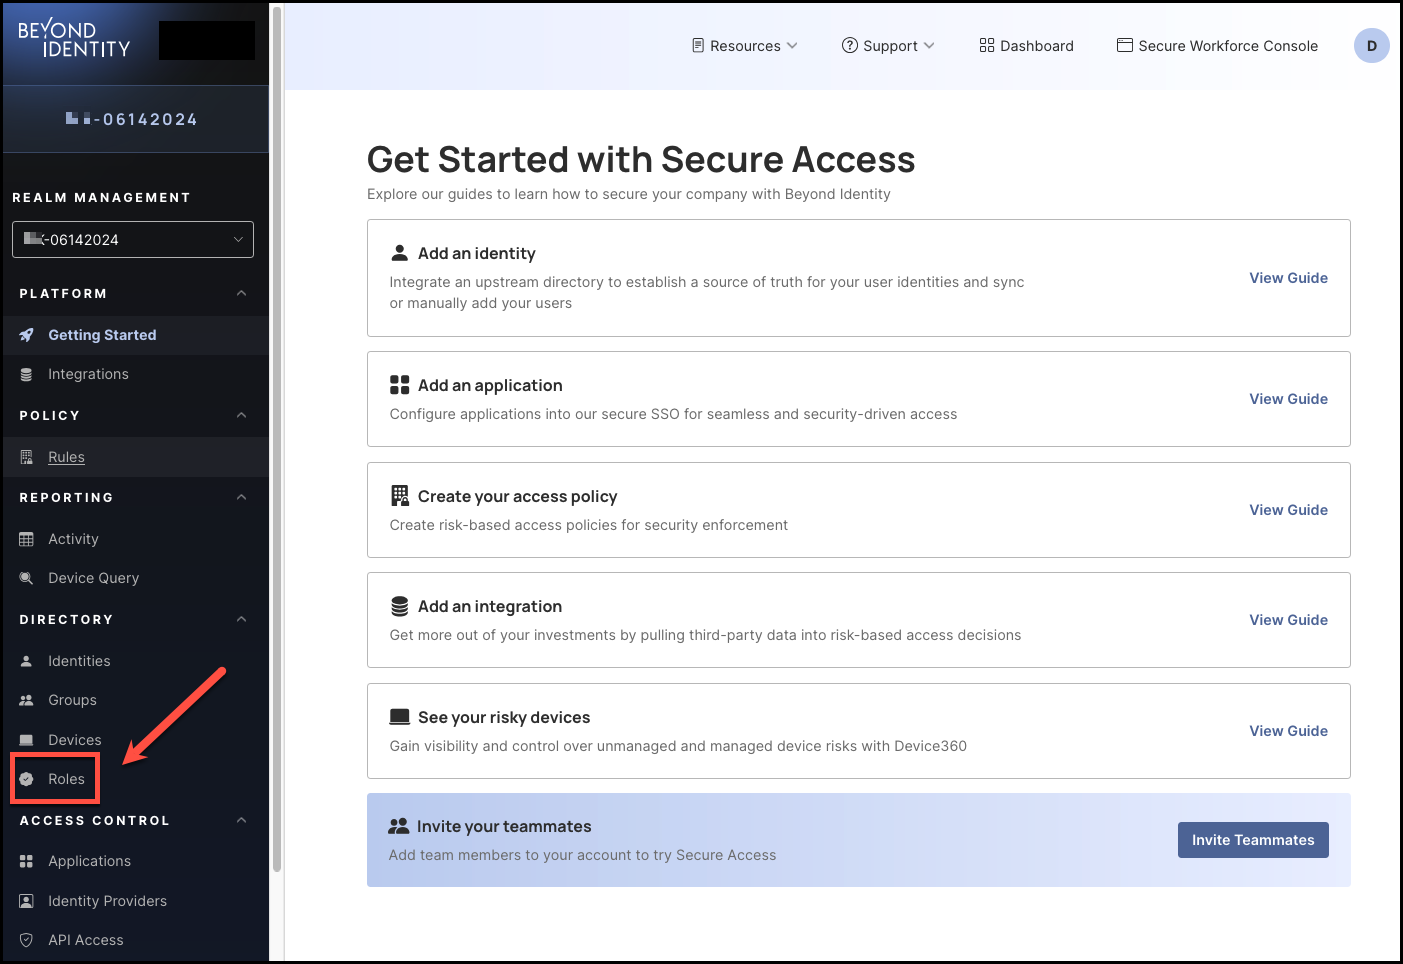
To create a role, click Roles from the left-hand navigation panel.
-
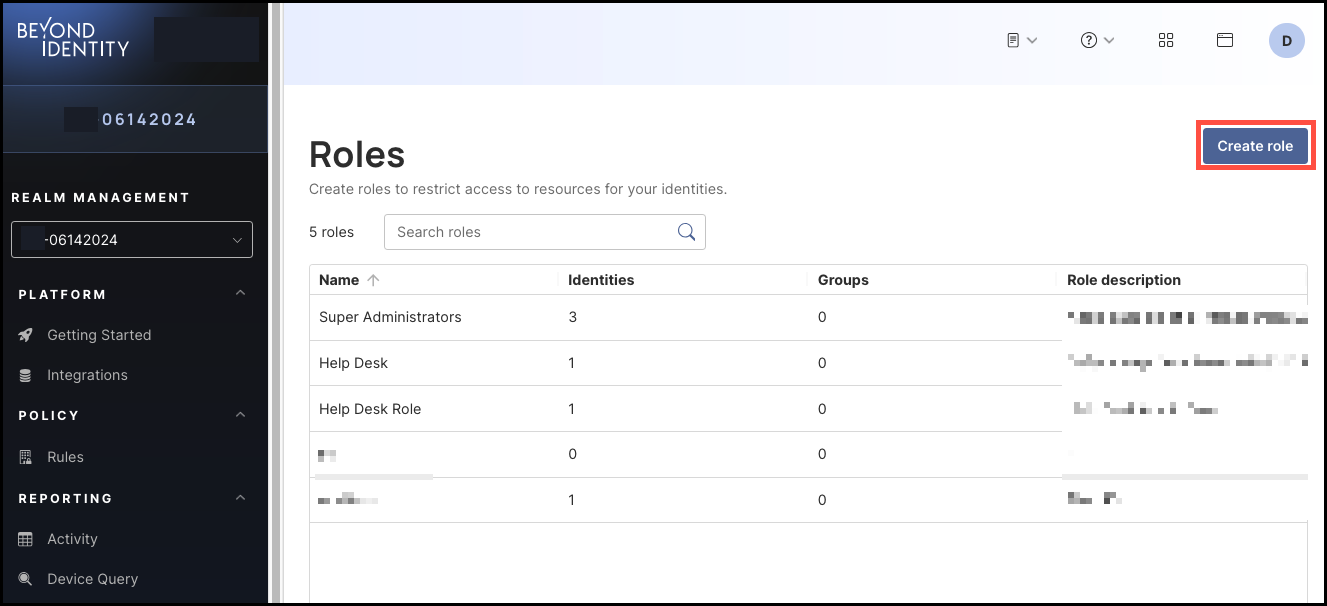
Click Create Role.
-
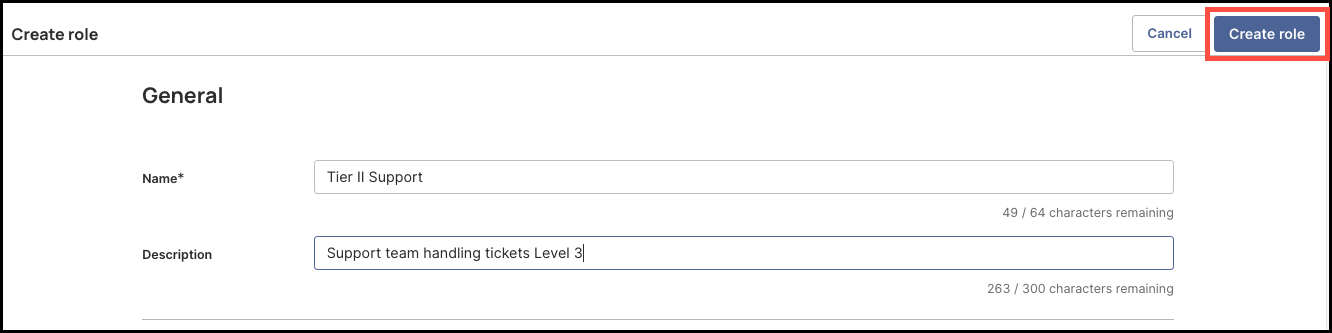
Enter the following information for the role you are creating:
- Name
- Description
- Then, in the Identities section, select the permissions the new role needs for managing identities (if any):
- Read Identities – View list of all identities and individual profiles
- Create Identities – Create identity profiles
- 🔒 Update Identities – Update identity profiles and manage identity status (suspend, reactivate)
- Delete Identities – Permanently delete identities
Selecting any 🔒 sensitive scope triggers special rules—see Sensitive or Administrative Permissions.
- In the Passkeys section, select all the permissions the new role needs for passkey management (if any):
- Read passkeys – View list of passkeys
- Create passkey emails – Create enrollment emails
- 🔒 Create passkey links – Send enrollment links
- 🔒 Create passkey via any method – Send enrollment of every kind
- Revoke passkey emails and passkey links – Revoke enrollment emails and enrollment links after they have been sent
- Update passkeys – Manage enrollment emails and revoke passkeys
- Delete passkeys – Permanently delete passkeys
Heads up: 🔒 items are sensitive scopes. If you select one, you must include all sensitive scopes. See Sensitive or Administrative Permissions.
- Select the Groups permission for the new role (if any):
- Read groups – View list of groups
- Create groups – Create groups
- 🔒 Update groups – Update group details
- Delete groups – Permanently delete groups
Heads up: 🔒 items are sensitive scopes. If you select one, you must include all sensitive scopes. See Sensitive or Administrative Permissions.
Note: To allow the role to manage users in a Groups, select the Read Identities permission under Identities (Step 4).
- Select the permissions for management of Devices for the new role (if any):
- View devices – List all devices in the fleet, see statistics
- Add devices – Add new devices
- Update devices – Update devices details
- Delete devices – Permanently remove devices
- Select the Roles permissions for the new role (if any):
- Read roles – View list of roles
- Create roles – Create roles
- 🔒 Update roles – Update roles
- Delete roles – Permanently delete roles
Heads up: 🔒 items are sensitive scopes. If you select one, you must include all sensitive scopes. See Sensitive or Administrative Permissions.
- Select the Events permissions for the new role (if any):
- Read events – View list of events
- Select the Applications permissions for the new role (if any):
- Read applications – View list of applications
- 🔒 Read application secrets – The ability to view secrets that are associated with applications
- Create applications – Create applications
- Update applications – Update application configurations
- Delete applications – Permanently delete applications
- Read app tiles – Read app tiles
- Create app tiles – Create app tiles
- Update app tiles – Update app tiles
- Delete app tiles – Delete app tiles
Heads up: 🔒 items are sensitive scopes. If you select one, you must include all sensitive scopes. See Sensitive or Administrative Permissions.
Note: To allow the role to manage identities for an application, select the Read Identities permission under Identities.
To allow the role to manage groups for an application, select the Read Groups permission under Groups.
- Select the Identity Providers permissions for the new role (if any):
- Read Identity Providers – View list of Identity Providers
- Create Identity Provider – Create Identity Provider
- Update Identity Provider – Update Identity Provider details
- Delete Identity Provider – Permanently delete Identity Provider
- Select the API Access permissions for the new role (if any):
- Read API Access – View API Access details and access tokens
- Update API Access – Create API Access Tokens
- Delete API Access tokens – Permanently delete API Access Tokens
- Select the Device Query permissions for the new role (if any):
- Read custom attributes – Read custom attributes
- Create custom attributes – Create custom attributes
- Update custom attributes – Update custom attributes
- Delete custom attributes – Delete custom attributes
- Select the Manage Attributes permissions for the new role (if any):
- Read managed attributes – Read managed attributes
- Create managed attributes – Create managed attributes
- Update managed attributes – Update managed attributes
- Delete managed attributes – Delete managed attributes
- Select the Policy permissions for the new role (if any):
- Read policy – View list of policy
- Update policy – Update policy rules
- Select the Branding permissions for the new role (if any):
- Read branding – View branding configuration
- Create branding – Create branding configurations
- Update branding – Update branding configuration
- Select the Integrations permissions for the new role (if any):
- Read integrations – View list of integrations
- Create integrations – Create integrations
- Update integrations – Update integrations details
- Delete integrations – Permanently delete integrations
- Select the Realms permissions for the new role (if any):
- Read realms – Read realms
- Create realms – Create new realms
- Update realms – Update realms
- Delete realms – Delete realms
- Select the Administration permissions for the new role (if any):
- Update tenant – Ability to update tenant-level settings
- Introspect tokens – Ability to introspect tokens assigned to a user
-
After you are finished selecting all the permissions for the new role, click Create Role, on the top right corner of the page.
-
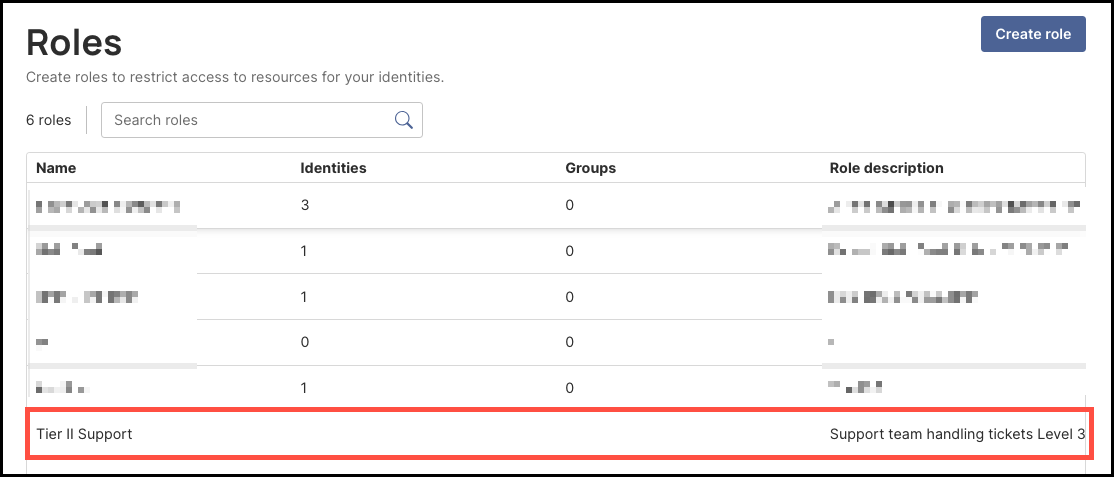
Once created, the new role will now appear in the Roles table.
Sensitive or Administrative Permissions (Feature-flagged)
Some permissions are sensitive scopes because they can be misused for privilege escalation or compromise (for example, modifying privileged identities, adding oneself to privileged groups, or generating credential-binding links for higher-privileged users). To reduce risk, when any sensitive scope is selected, all sensitive scopes must be selected together. This effectively makes the role Super Admin–equivalent and prevents partially privileged “backdoor” roles. This enforcement is currently feature-flag controlled (not GA).
Sensitive Scopes (current set)
identities:update— Could change a higher-privileged user’s email to an attacker-controlled email to take over that account.groups:update— Could add oneself to a privileged group and escalate access.applications:read-secrets— Could expose confidential application credentials.credential-binding-jobs:create-links— Could generate a passkey binding link for a privileged identity and use it to impersonate that user.credential-binding-jobs:create— Similar impersonation risk when used against privileged identities.roles:update— Could silently widen privileges for other admins or self.
Enforcement rule (when the feature flag is enabled): Selecting any one of the above requires all to be selected. Otherwise, remove sensitive scopes and design a least-privilege role instead.
Example validation message (when enforcement is on):
All sensitive scopes must be selected together.
Include all sensitive permissions or remove them from the role.
Recommended Service Desk Role (Least Privilege)
For a support-focused Service Desk role, use the non-sensitive scopes below. This allows common user lifecycle work without exposing sensitive operations. If a task requires sensitive scopes, escalate to a Super Admin.
Identity Management
identities:readidentities:createidentities:delete- Do not include
identities:update
Passkey Management
credential-binding-jobs:create-email(send enrollment emails)- Do not include
credential-binding-jobs:createorcredential-binding-jobs:create-links
Groups & Access
groups:read- Do not include
groups:update
Read-Only
policies:readapplications:read(no secrets)
FAQ
Why require all sensitive scopes together?
To prevent partially privileged roles that can be chained into privilege escalation; the platform enforces this automatically for tenants with the feature flag enabled.
Is the enforcement GA?
No. It is feature-flagged and may be enabled for certain customers/tenants.