Add Groups to Roles
Overview
After creating a new role, you can assign Directory groups to it. These groups will inherit the permissions you defined when setting up the role. For example, if the role includes the Read passkeys permission, any groups added to the role will automatically have the ability to read passkeys.
What You'll Learn
This article will guide you through the process of:
- Adding groups to a role
- Removing groups from a role
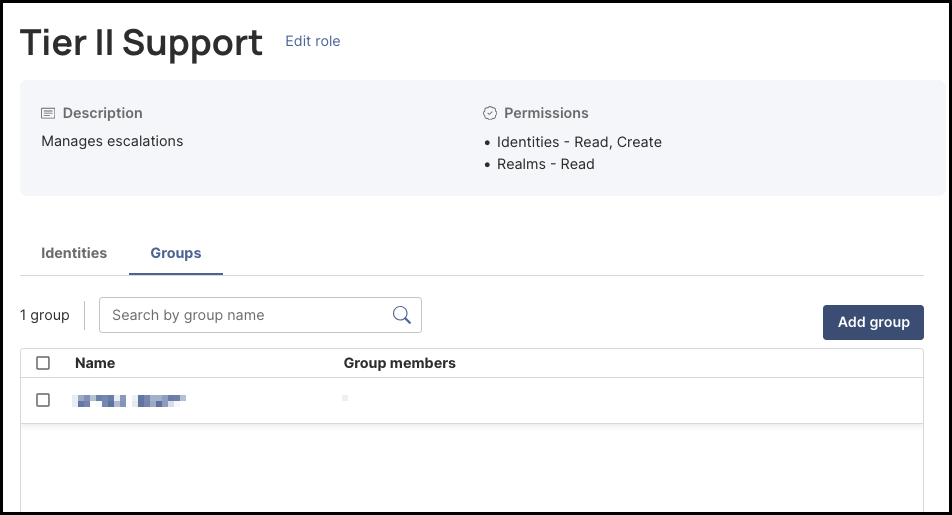
How to Add Groups to a Role
Steps
-
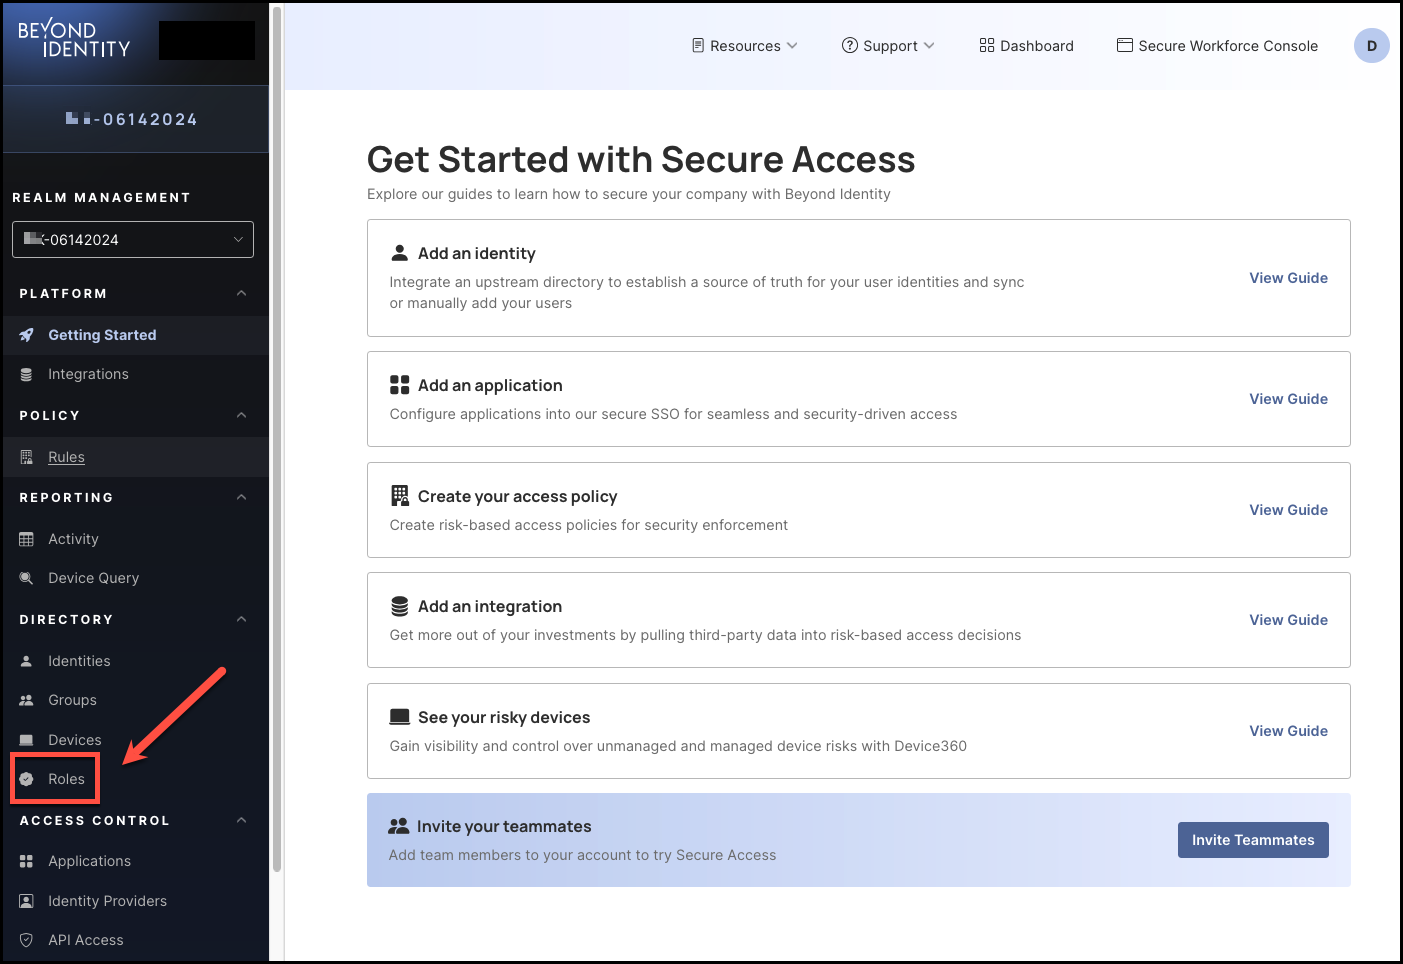
To add groups to a role, click Roles from the left-hand navigation panel.
-
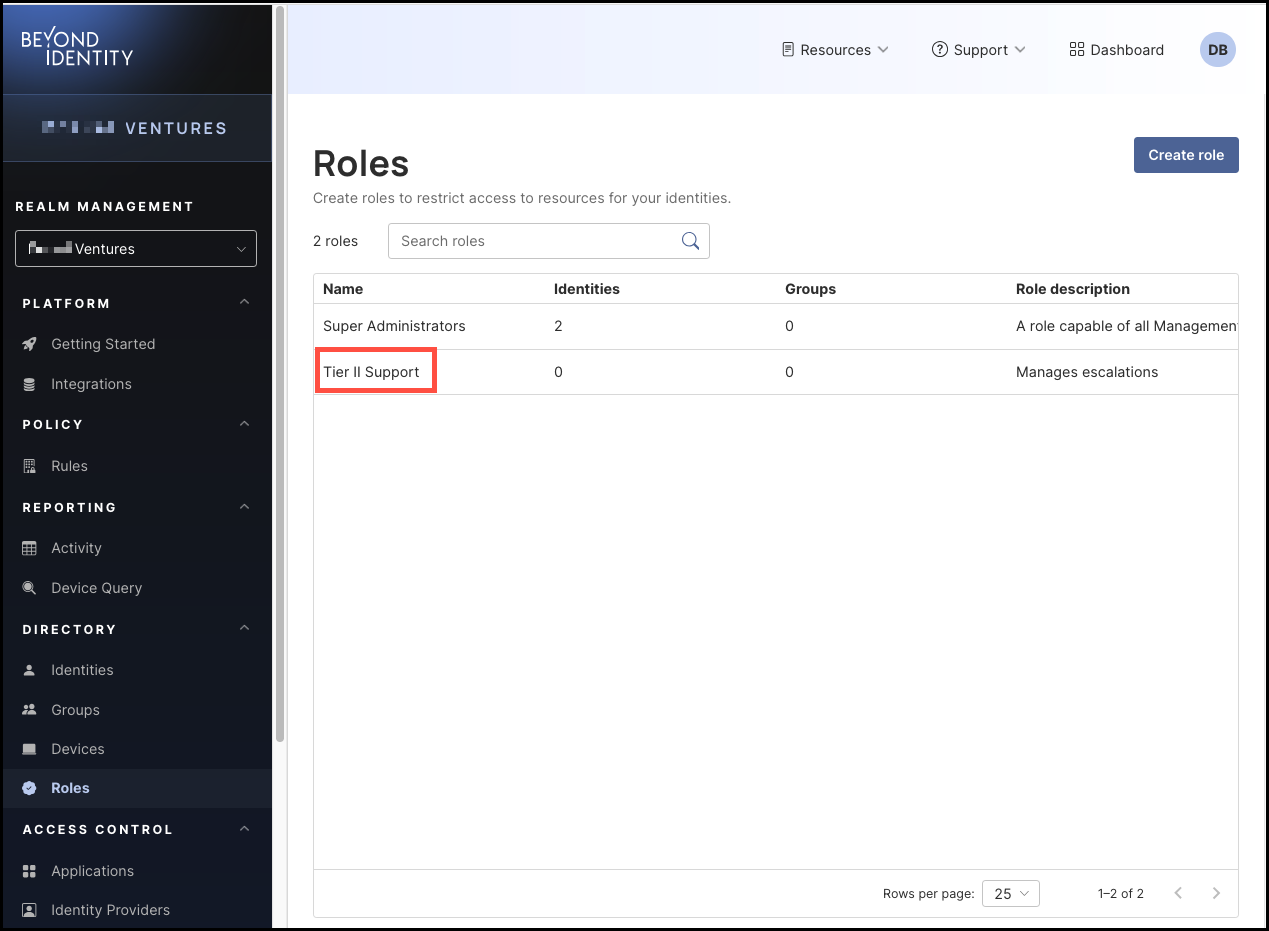
In the Roles table, click the name of the role to which you want to add groups.
-
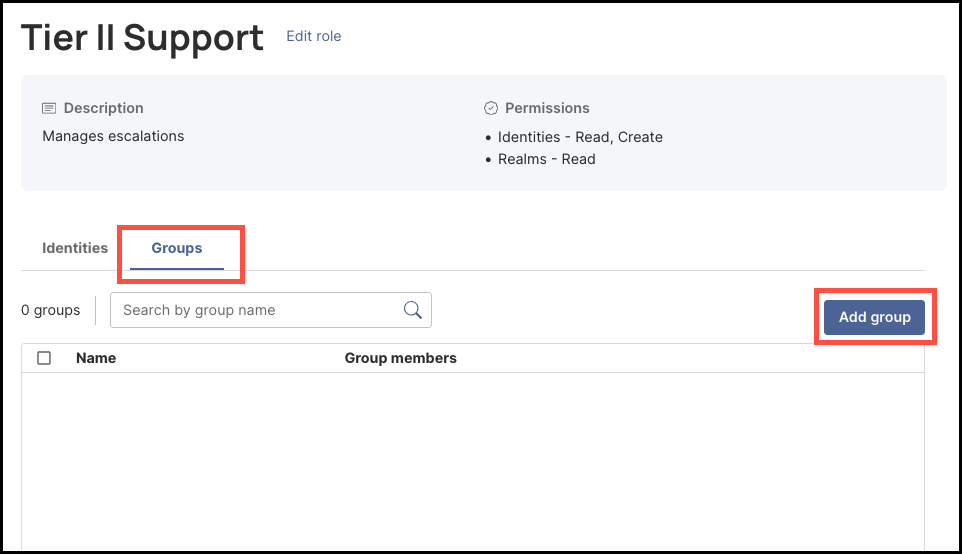
Select the Groups tab, then click Add group.
-
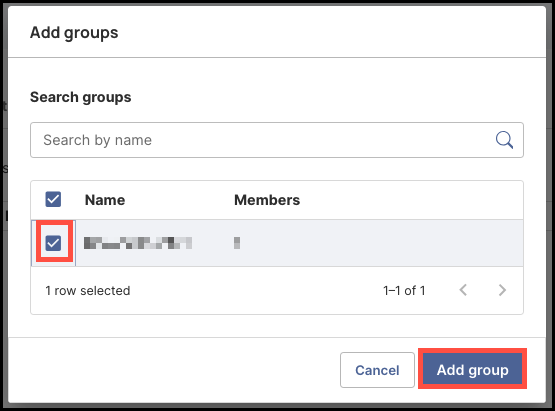
Select the group(s) you want to add to the role. You can also use the Search groups bar to find groups you may not see listed. When you are finished, click Add group.
-
The group you selected to add to the role will now be listed on the Groups tab.
How to Remove a Group from a Role
To remove a group from a role, select it from the Groups tab, then click Remove group from role.

You won’t be prompted to confirm the removal of the selected group. The process is automatic once you click Remove group from role.
Also, note that removing groups from roles do not delete them from the Directory.